Emulator
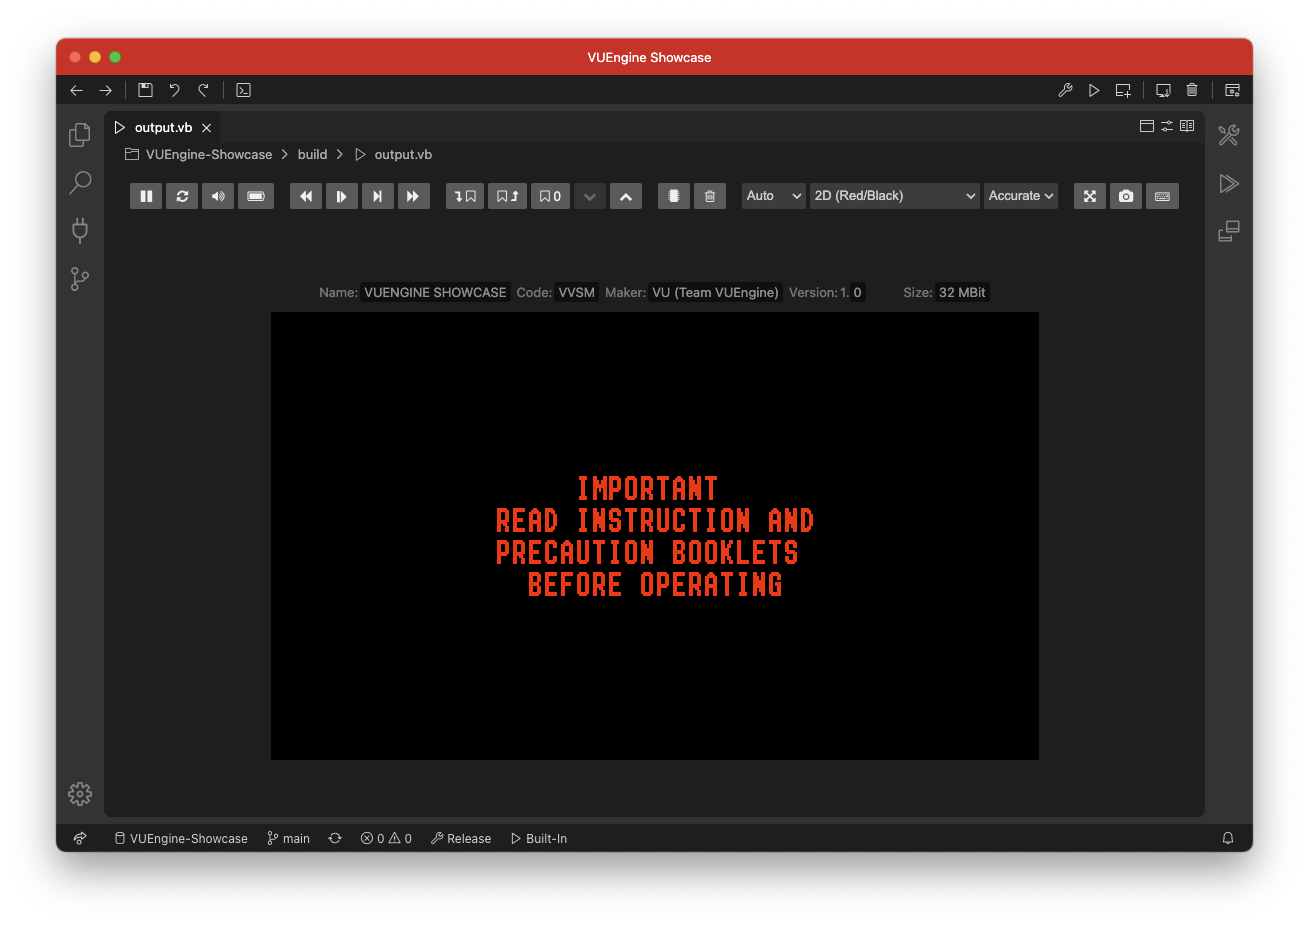
As part of VUEngine Studio’s build chain, you can run your project on an emulator through the emulator sidebar or with the command Run on Emulator Shift+Alt+R. If no ROM exists yet, or a build is currently in progress, running in the emulator will be queued to happen after the build has succeeded.
VUEngine Studio comes with a built-in, fully embedded emulator, but of course, any emulator can be configured to be used instead.
# The Built-In Emulator
# Key Bindings
The built-in emulator’s key bindings try to mimick the Virtual Boy controller’s buttom layout on a keyboard and is as follows.
- Left D-Pad Up: E
- Left D-Pad Left: S
- Left D-Pad Right: F
- Left D-Pad Down: D
- B Button: N
- A Button: M
- Select Button: V
- Start Button: B
- Left Trigger Button: G
- Right Trigger Button:H
- Right D-Pad Up: I
- Right D-Pad Left: J
- Right D-Pad Right: L
- Right D-Pad Down: K
There’s also the following functional key bindings as a secondary way to access the respective toolbar function.
- Toggle Pause Space
- Reset F10
- Audio Mute Q
- Toggle Low Power Signal W
- Frame Advance ↑
- Toggle Fast Forward →
- Toggle Slow Motion ↓
- Rewind ←
- Save State 1
- Load State 2
- Increase Save State Slot 4
- Decrease Save State Slot 3
- Fullscreen O
- Take Screenshot F9
- Toggle Controls Overlay
All of the key bindings above can be changed in the emulator’s Input overlay that can be toggled through the toolbar.

# Red Viper
As a secondary built-in emulator, VUEngine Studio supports playtesting on a Nintendo 3DS using the Red Viper emulator (version v0.9.5 and up). This allows you to comfortably preview in stereo at true 50Hz. The integration utilizes the VBLink protocol to wirelessly send your ROM over your home WiFi.
# Setup
Boot up Red Viper and press Y on the main menu to set it to listen for new ROMs being transferred via VBLink.
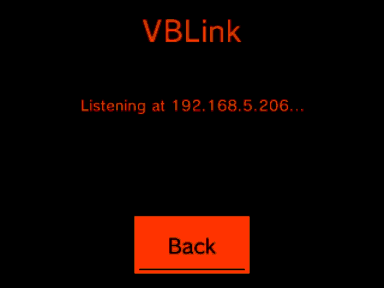
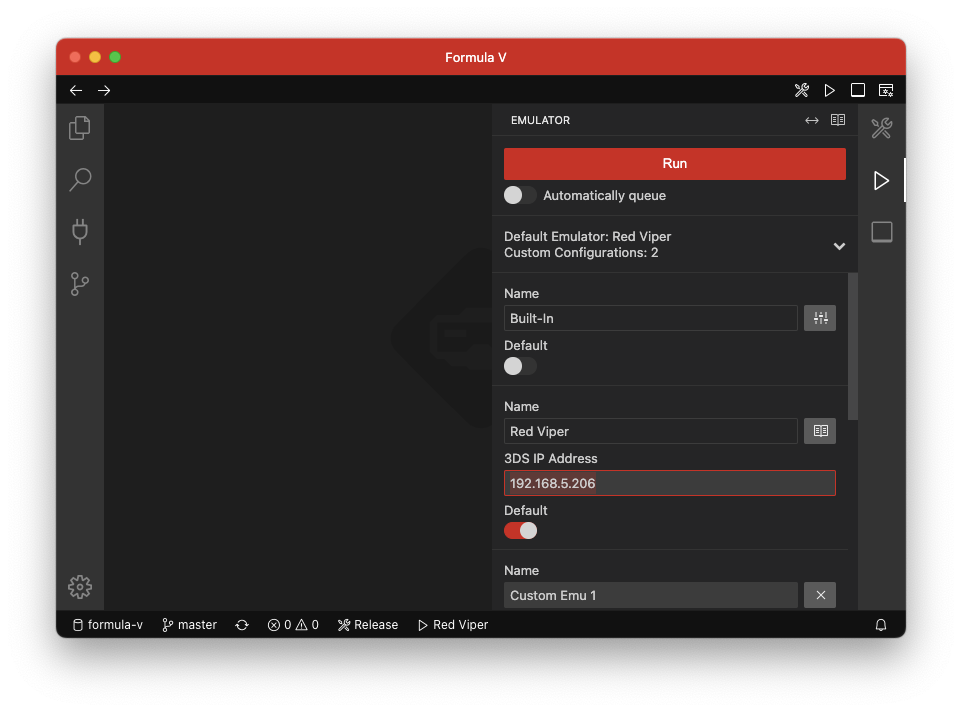
The above screen displays your Nintendo 3DS’ IP address, 192.168.5.206 in this case. Configure VUEngine Studio accordingly and set Red Viper as the default emulator, as seen in the following screenshot.
# Usage
If Red Viper is set as the default emulator and as long as Red Viper is on the VBLink screen listening on the configured IP address, you’re now able to use it just like any other emulator.
# Custom Configurations
As an alternative to using the built-in emulator, you can also configure custom emulator configurations. This can be useful if for instance an external emulator offers functionality that is not present in the built-in one.
To set up your custom configurations, open the emulator sidebar, expand the Configuration Panel on the bottom and click the “+” button on the bottom.
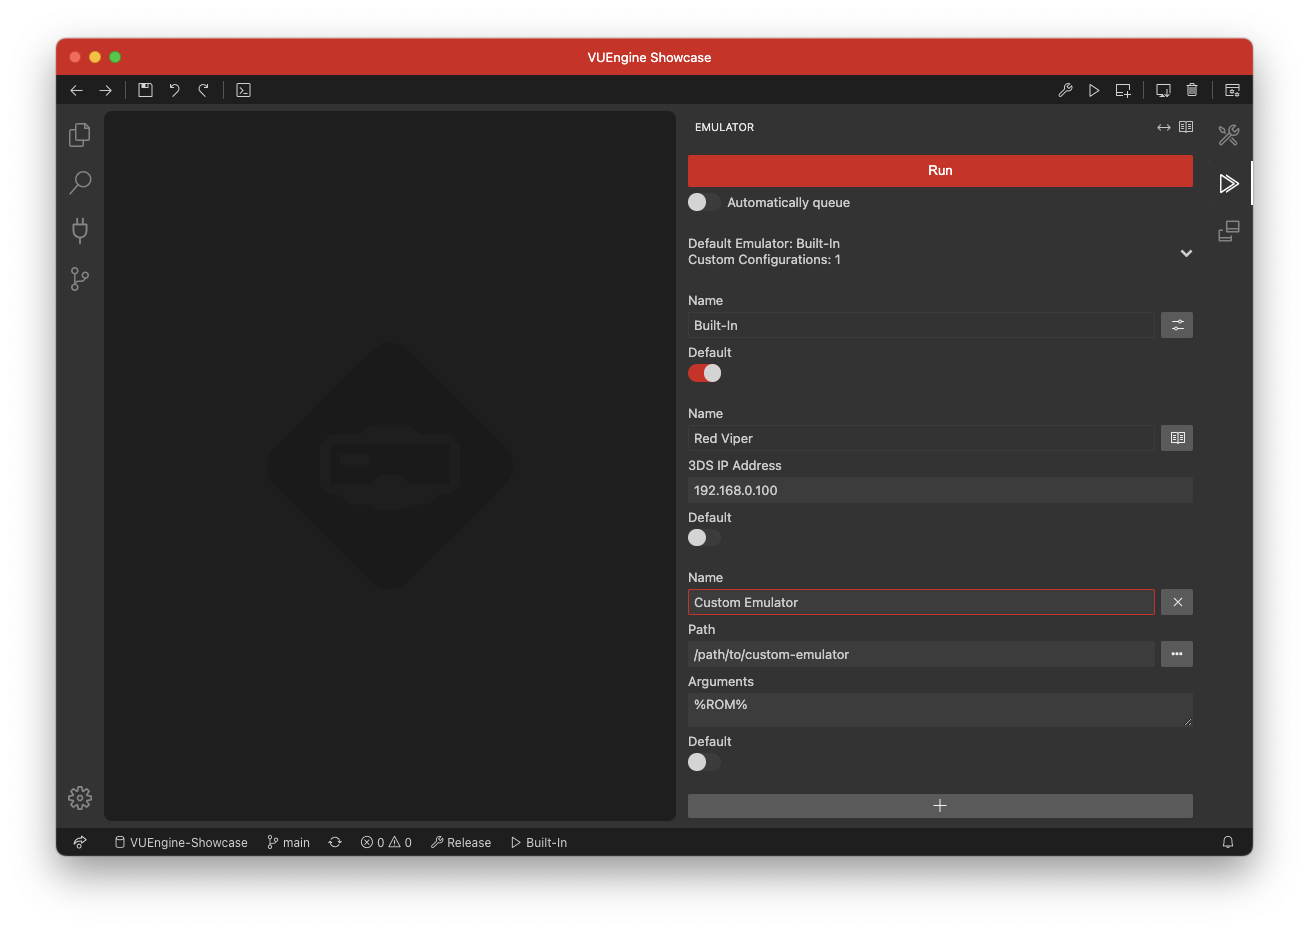
An emulator config consists of the following information:
- Name: Name of the emulator (configuration), for display purposes only.
- Path: Full path to the emulator executable.
- Arguments: Arguments passed to the emulator software. Supports the placeholder %ROM% for the full path to the project ROM.
Your custom emulator configurations will be written to the emulator.custom.configs setting as in the following example.
"emulator.custom.configs": [{
    "name": "Mednafen (Mono)",
    "path": "/absolute/path/to/mednafen",
    "args": "-vb.3dmode anaglyph -vb.anaglyph.preset disabled -vb.anaglyph.lcolor 0xff0000 -vb.anaglyph.rcolor 0x000000 -vb.xscale 2 -vb.yscale 2 %ROM%"
}, {
    "name": "Mednafen (Anaglyph)",
    "path": "/absolute/path/to/mednafen",
    "args": "-vb.3dmode anaglyph -vb.anaglyph.preset red_blue -vb.anaglyph.lcolor 0xffba00 -vb.anaglyph.rcolor 0x00baff -vb.xscale 2 -vb.yscale 2 %ROM%"
}]
# Default Emulator
To configure VUEngine Studio to make use of any of your custom emulator configurations, you have to choose it as the new default emulator using the command Emulator: Set Default Emulator Config or by clicking on the respective entry in the status bar.
The default emulator will be written to the emulator.custom.default setting.
Note: The name of your chosen default emulator is used as the setting value. So be aware that you have to reset it in case you change the name of the respective emulator configuration.