Getting Started
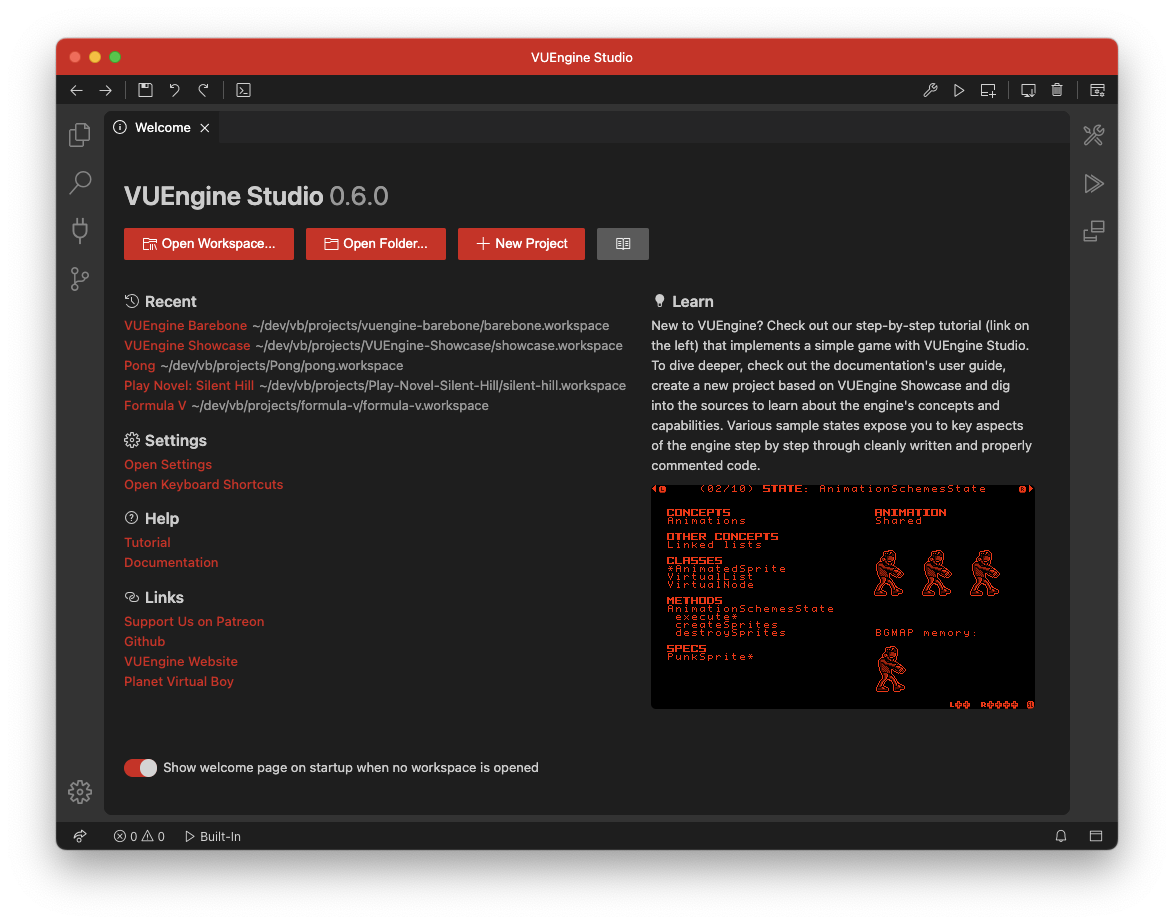
When opening VUEngine Studio, you’ll be greeted with the “Welcome” view as seen in the screenshot below. From there you can either open an existing project by clicking on the Open Workspace or Open Folder buttons or create a new one by clicking the New Project button.
If you have opened any projects before, you’ll see a handy list here as well under Recent. Click to open any of these project.
Tip: You can also quickly access a list of recently opened workspaces at any time by clicking on the application title, “VUEngine Studio” in case of the screenshot below.
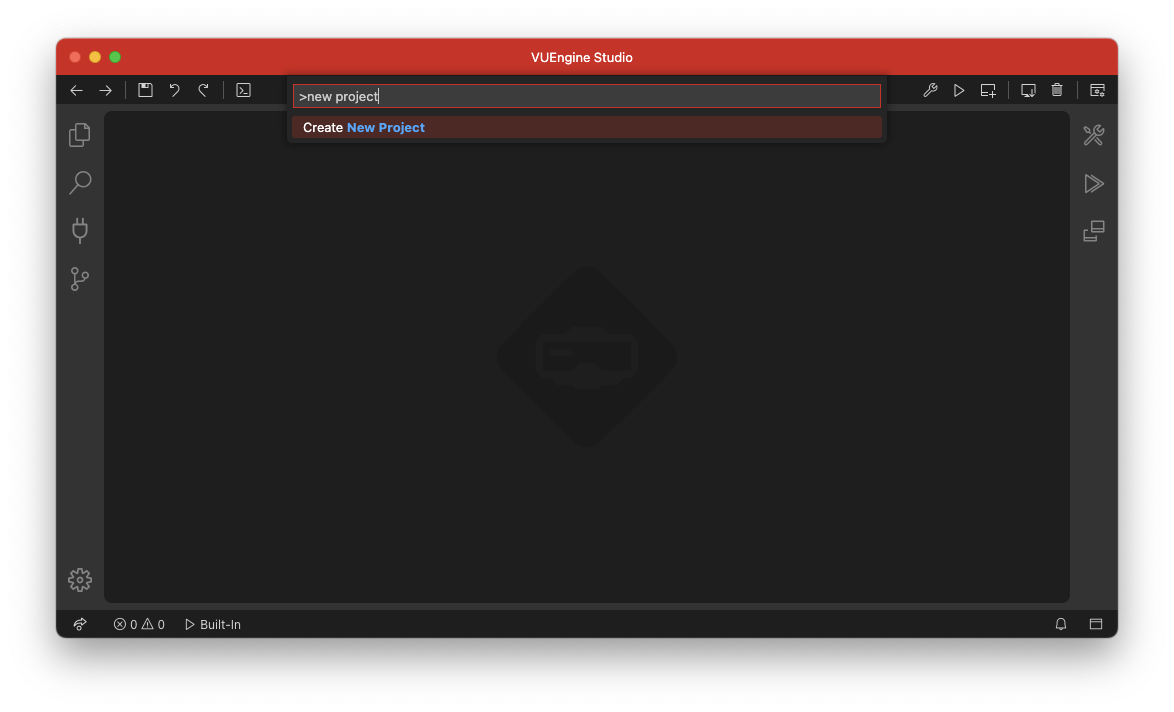
If you have closed the “Welcome” view and can’t see it anymore, you can open it again through the main menu with Help > Welcome or through the command palette Ctrl+P. You could also just use the command palette to create a new project as shown in the screenshot below.
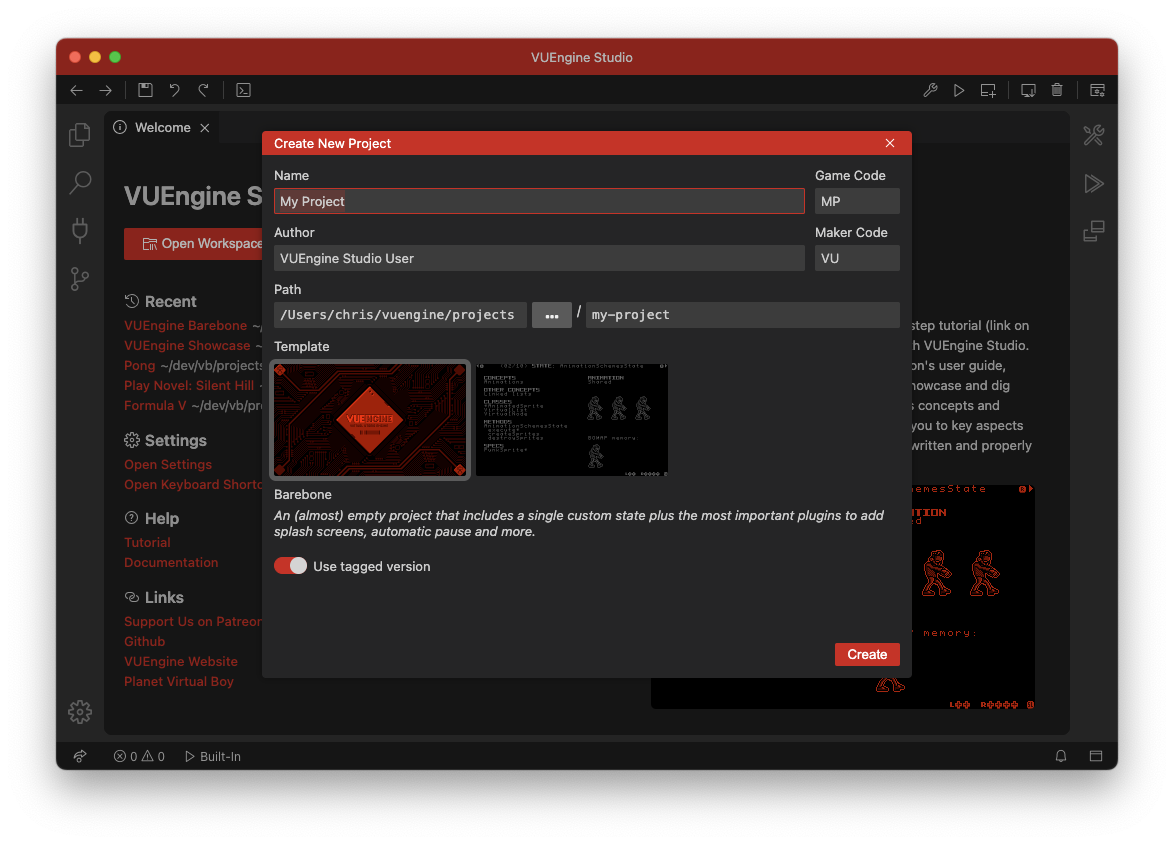
# New Project
The “Create New Project” dialog allows you to create a new project based on a template project.
- Barebone: An (almost) empty project that includes a single custom state plus the most important plugins to add splash screens, automatic pause and more.
- Showcase: Showcase project to be used as the foundation for learning about VUEngine’s concepts and capabilities step by step through cleanly written and properly commented code.
To ensure compatibility with VUEngine and VUEngine Studio, stable versions of each template get tagged for every release of VUEngine Studio. Unchecking the “Use tagged version” checkbox will cause the latest version of the template to be used as foundation for the new project. Be aware that compatibility is not guaranteed in that case!
Additional demos and samples, such as Capitán Sevilla 3D, can be found among our GitHub repositories. But note that only for the selectable templates, we ensure compatibility with the latest shipped version of VUEngine, so other sources will likely require some additional work to get running.
The project name, game code to be placed in the ROM header, the author name, author code to be placed in the ROM header and a location to save the project to are all pretty self-explanatory. Note that all of these can be easily changed later on, so you don’t need to worry too much.
After clicking the “Create” button, VUEngine Studio will download the template, create the new project and afterwards automatically open it.
ATTENTION: Windows/MSYS is quite sensitive in regards to folder names. So, if you’re on Windows, you better make sure to use both a short base folder and short project folder names.